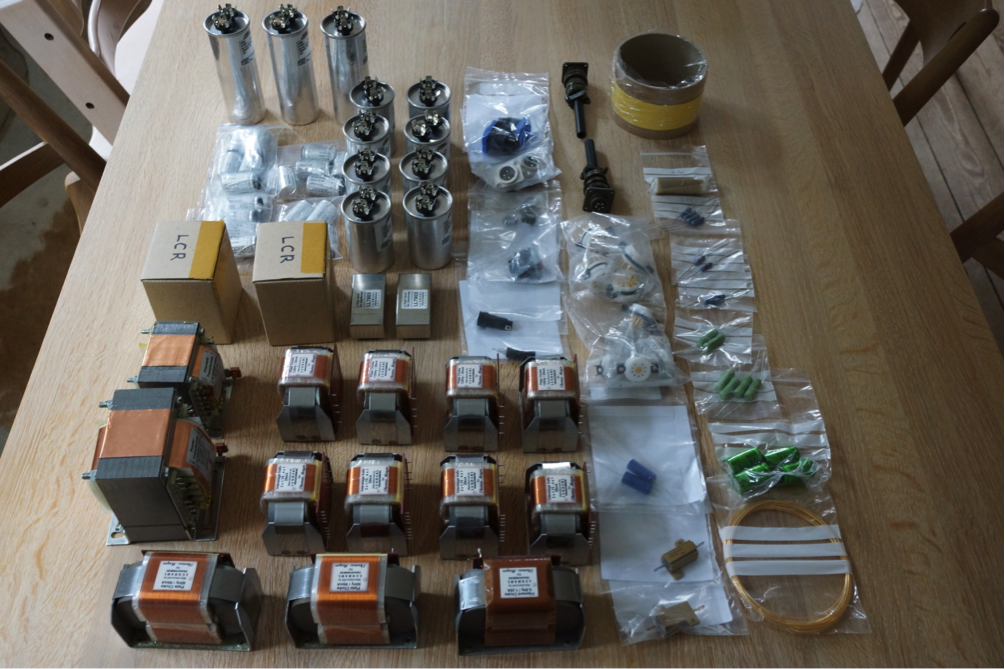
Oliver who built some amplifiers based on kits from me was so kind to share his experience...
Hi, I'm
Oliver and I live in Brooklyn, NY. Some time ago Thomas asked me to write about
my experience building a 10y/45/50 amplifier, finally here it is!
I've
always been a music lover/collector but discovered tubes accidentally when I
inherited a pair of Altec Model 19 speakers along with some old Quad 2 amps and
matching 22 preamp. Like most children of the 80's I had no idea what those
strange light bulb things were but they sure sounded nice so after some
research and soldering practice the Quads were restored and my first tube
guitar amp built.
Pretty
quickly I was hooked! I discovered the long out of print Sound Practices
magazine which helped feed my tube addiction and I began building stereo amps
of various kinds but especially single ended types with the wonderful 45. I
also became aware of Thomas from the Sound Practices 'homebrewer of the month'
feature where he detailed very intriguing 211/211 amplifier with an elaborate 3
phase power supply, this captured my imagination and I immediately hunted to
find some of the Tango NC-20 interstage transformers mentioned.

A few
years and many amplifiers later I stumbled upon the Vinyl Savor Blog when
Thomas first posted his 45/2a3 amplifier, As soon as I saw it I knew I had to
have one. Before mustering up the courage (and finances) to build that
particular amp however I decided to start with one of the simpler circuits
generously published as the Single Ended Amplifier Concept. The basic design
appealed on many levels, it was elegantly simple, had no cathode bypass
capacitors, lots of iron including choke loaded power supply and was versatile
in driver tube choice between 6j5/6p5/6n7, of which I had many examples.
Another huge bonus was that I already had most of the Lundahl iron from a
previously aborted project so the additional investment wouldn't be that large.
The
Lundahl power transformer I used didn't have a centre tap on the high voltage
winding so I settled on a hybrid bridge rectifier with 6ax4 and BY229 diodes
and in the end chose 45 over 46 in the output stage, otherwise it was simply
built as drawn. All the fabrication was done the old fashioned way (no CAD or
CNC) with ruler and pencil, it was time consuming but relatively simple and all
carried out in my garage with rudimentary tools. I tried as much as possible to
remain faithful to Thomas' aesthetic and layered sub chassis approach using
standoffs and aluminium angle stock to secure the many pieces of iron, it took
a lot of planning the first time but after the layout was finalized and all the
iron mounted completing wiring was very fast and now I am a big fan of this
layered approach.

As often
happens there was some trouble shooting to get things working correctly but
once the problem was found (incorrect connection of the output transformer
secondary) I was immediately impressed by what I heard. It seemed to magnify
all the strengths of 45 tube and I couldn't find any audible weakness,
especially impressive was the rock solid low end and the sense of focus and
composure on more complex music.
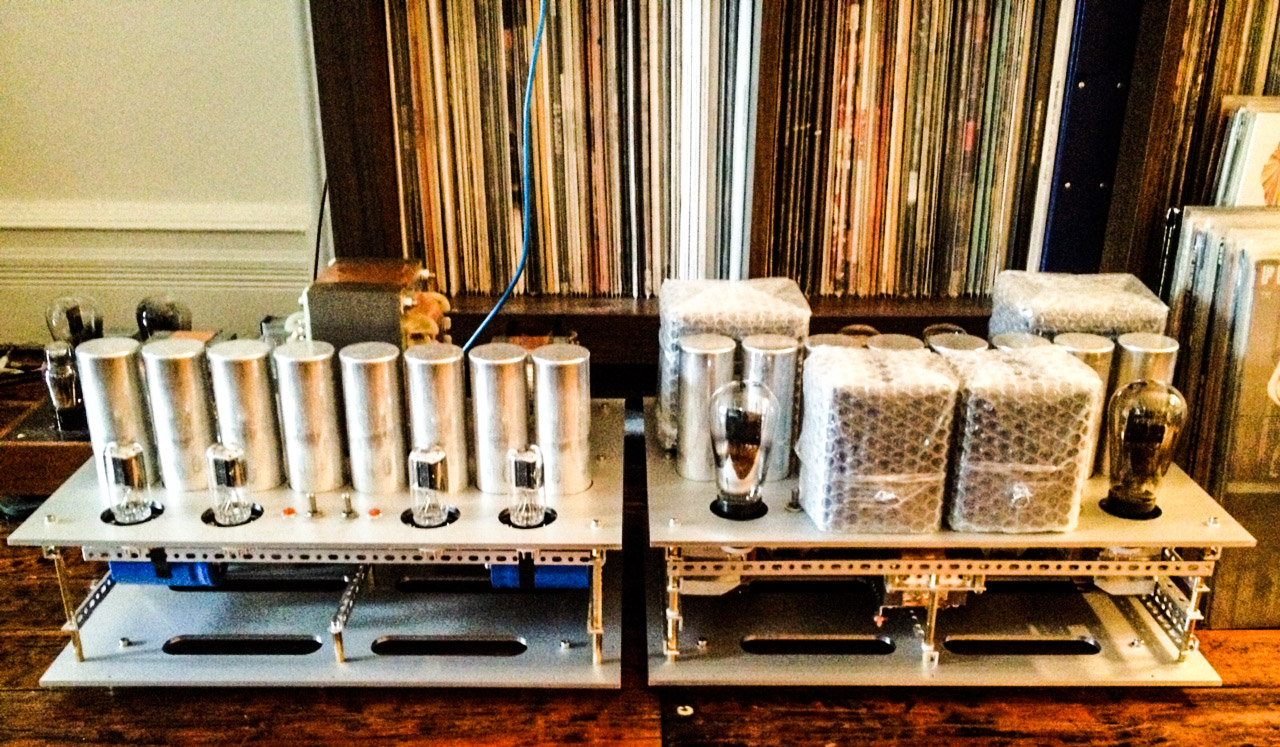
Before
long my friend Daniel heard the music at my place and decided he needed to
build a Thomas Mayer 10y/45 amp too. After the initial planning stage all the
necessary iron was ordered from Thomas and we sourced the passive components
ourselves, soon packages full of exotic parts started arriving from around the
globe. Since I had some 50 and VT-52 triodes I wanted to try in the output
stage I added a few features to the basic design including a switch arrangement
to increase/decrease the B+ and 2 additional passively filtered DC filament
supplies for the output tubes, also switched, to alter filament and bias
voltage. Since I had larger Tango XE-60 output transformers I ended up with a
larger footprint and made some slight changes to the existing layout, all the
capacitors were moved to the top plate and the 6 additional transformers and
necessary passive components were mounted inside their respective chassis. I
also really wanted the impressive blue glow of mercury vapour rectifiers so
with some help from Thomas we were able to devise a way to do this using 816a
and the filament windings on the existing power transformer. The power supply
also got a little extra reservoir capacitance and a dual switch arrangement for
preheating those precious antique triodes, although the high voltage rises
slowly enough with the 6ax4 damper diodes.

Again all
the construction was slowly done by hand, so slowly that I was able to hear
Daniels' finished amp before my own. Needless to say we were both extremely
pleased by the results, the transparency and air that the 10y contributes to
the top end is fantastic, realism and tone abound and it uncovers all kinds of
previously hidden details. To me this is the ultimate realization of a 45
amplifier and something I will never let out of my hands.


Since it
was made with ease of modification in mind I've been able to try many
combinations of DHT in both driver and output sockets and one of my favourites
has been 801a/801a, although not an ideal match for the output transformers it
was a very pleasant surprise and so lifelike the equipment simply disappeared
leaving just music floating in space. Definitely something I want to
investigate in the future. Also possible for the future is trying out the Elrog
300b which will fit right into the circuit with only the slightest
modification.

Lastly I
wanted to share a recently finished project which is a redux of the initial
6n7/46 build. This time I used a set of NOS Tamura iron and decided to go with
the separate bridge rectifier power supply for a no compromise approach. One
drawback commonly mentioned of the Tamura transformers is the slightly narrow
bandwidth but I certainly don't notice this, very clear and extended with
simply beautiful tone. Next is a matching LCR d3a phono stage built up in the
same style, can't wait to get my soldering iron in it's heated state again.

Big thanks must go to Thomas for sharing his wonderful designs and providing the critical parts to make them a reality. Always willing to answer my questions (of which there were many) and a great source of inspiration. I'd encourage anyone out there considering building one of Thomas kits to go for it. A great learning experience and a truly world class finished product, I simply can't imagine building anything better!
Many thanks to Oliver for sharing his story!
Best regards
Thomas