DISCLAIMER

All rights of photos and text reserved. Usage of photos or text from my blog on other websites or for any other purpose only with prior permission. If you want to use any material from my blog please contact me by email.

Saturday, June 29, 2013

The Octal Phono Preamplifier, Part 4: Assembly

Hi!

In this post I will show the assembly of the Octal phono stage with the more elaborate power supply which was introduced in the previous post.


Most of the parts are mounted to the top plate. Here the plate with the sockets, power transformers and one of the chokes:


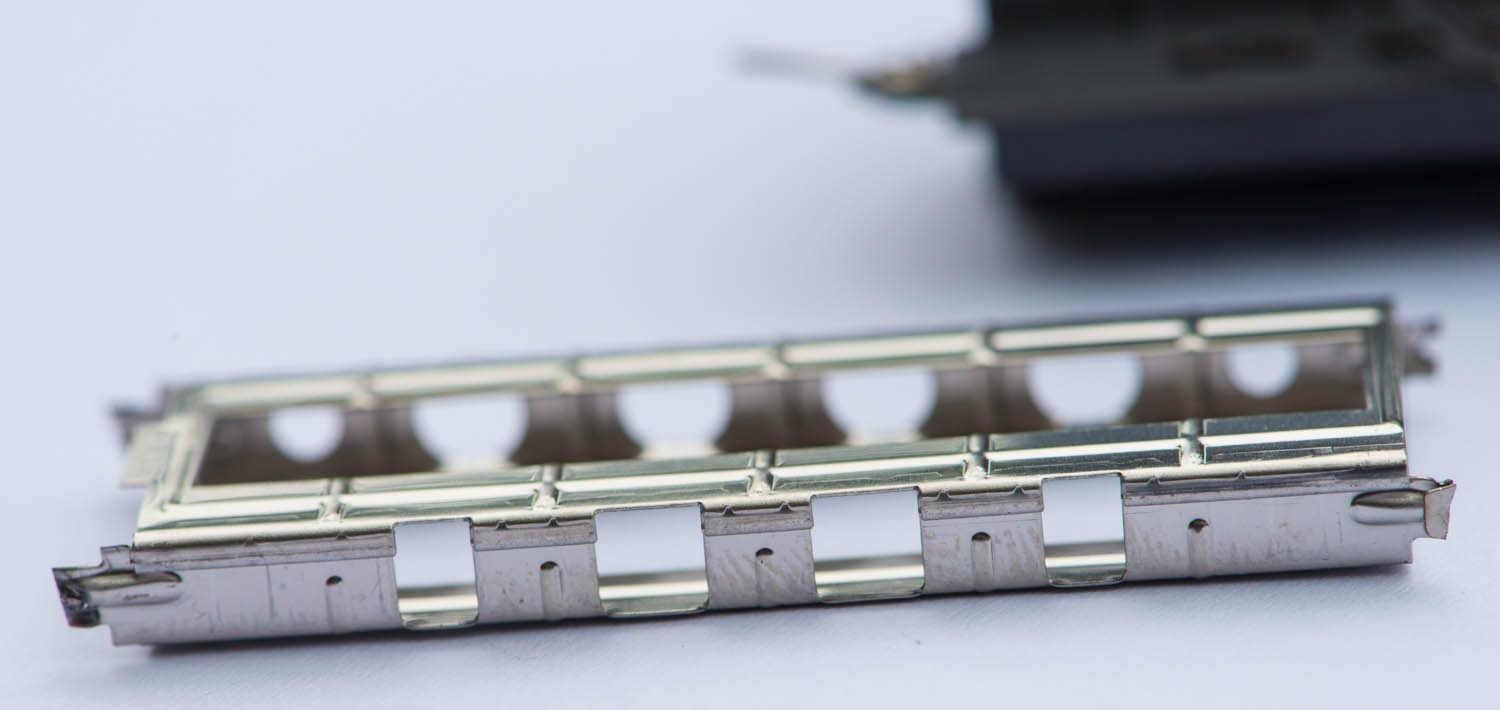
The sockets of the signal tubes are mounted with vibration damping rubber pieces:


Wiring of the heaters and rectifier tube:


Adding the heater choke and the terminal strips for all the passive parts:


Adding the passive components:


The finished phono stage from the back side during the first test run:


Completed with covers for the transformers and B+ choke:


Some comments about the sound from the first user of this phono preamplifier:

This preamp has absolutely no hum in my system. What is remarkable is also the absence of any other noise. It is just as quiet as the transistor phono stage which I was using before which got praise for it's low noise. The sound stage is first class which is important for me since a lack of sound stage would be immediately apparent through my electrostatic speakers. Everything is at the right place and the sound stage extends well outside of the speakers. The music is very powerful. This preamp sounds very relaxed and enjoyable both at high and low listening levels. I have found 'my' phono stage.

The phono stage in it's new home:


And for the german readers the comments of the owner in german:


Absolut kein Brumm! 

Das Ding ist unglaublich rauscharm! Tatsächlich ist diese Phonopre bei "meiner" Lautstärke in den Pausen zwischen zwei Titeln genauso "mucksmäuschenstill" wie meine vorherige Phono (und dieser "transe" hat man u.a. DAS als ganz grossen Vorteil ggü. Röhre attestiert) Also auch in diesem Punkt: Hut ab!

Räumlichkeit ist allererste Sahne! Das war mir ja besonders wichtig, weil einem (bzw. mir) beim Hören über Elektrostaten soetwas sofort (negativ) auffällt. Ich denke dass deine Phono eine extrem gute Kanaltrennung haben muss. Jedenfalls ist bei "Harry Belafonte sings the Blues" alles an seinem Platz, bzw. dort, wo ich es in Erinnerung habe und die Musik geht unveränder rechts und links über die Elektrostaten hinaus.

Was mir ( jedenfalls am Anfang) aufgefallen ist: ggü. anderen Präs hatte ich das Gefühl, etwas mehr Abstand zur Bühne zu habe. Also jetzt Reihe 15 und vorher Reihe 3. Was explizit keine Kritik ist! 

Meine Freundin meinte noch, dass die Musik jetzt irgendwie "kraftvoller" rüberkommt als vorher. Ich hab Sie gefragt, ob sie "wärmer" meinte, aber das hat sie eindeutig verneint. 

Und dann (sehr laienhaft und für dich vielleicht komisch) noch etwas sehr Positives zum Schluss:

Hatte gestern abend wieder das gleiche Erlebnis wie meine erste Begegnung mit einem McIntosh: wenn ich Musik höre in "normaler" Laustärke (also kein Hintergrundgedudel) und dann trotzdem so entspannt hören kann, dass ich ab und zu (trotz relativ hoher Lautstärke) fast einschlafe! Entspannung! Das ist der Grund, warum ich Musik höre!


Thanks a lot to Steffen for the description and the photos.


Best regards

Thomas

Thursday, June 27, 2013

The Octal Phono Preamplifier, Part 3 : Power Supply

Hi!

The schematic of the signal section of the Octal phono stage was already shown in part 1. What is still missing is the power supply. In this post I will show two possible variants. The first one is quite simple without any chokes and only a single power transformer.


This PSU uses a hybrid full wave rectifier with a 6BY5 and two UF4007 silicon diodes. The smoothing of the B+ voltage is done through a couple RC filter segments using electrolytic caps. I used my smallest power transformer which only has a single 6.3V heater winding. So this had to be used for the rectifier and signal tubes. The rectifier is hooked up directly to the heater winding, while the heater voltages for the signal tubes are rectified by a bridge of Schottky diodes. A small dropping resistor brings the voltage to the desired 6.3V. Smoothing is done by a bank of 4 10.000uF electrolytic caps. Not the most elegant solution. Better would be to have separate heater windings. But it works like this. I wanted to use the smallest power transformer which I have so that the whole phone stage fits into a single wooden chassis as used with my 6AH4 line stage.


All the resistors in this circuit should be at least 5W or higher rated. The 100K/10K voltage divider at the end of the B+ filter chain serves as bleeder resistor and provides a positive bias voltage to elevate the heater potential.

The supply was used like this in the first prototype build and works nicely without hum, even with the power transformer in the same chassis.

The first user of this phonostage however asked if he can have a chassis style which has the tubes visibly exposed on the top. Something in the style of the recently built D3a phono stage. With only the tubes on the top of the chassis, this would be a bit too empty. So it would need something else to fill the surface. This would be possible by bringing the power transformer on the top as well and by adding some chokes. So I designed another power supply which is a bit more elaborate:


Separate transformers for the B+ and heater voltages of the signal tubes. Both supplies with choke input filter. 

The assembly of this version will be covered in part 4. Stay tuned.

Best regards

Thomas

Sunday, June 23, 2013

Guest Post: Diego's 6CB5A Amp


Hi!

Earlier this year I had the pleasure of getting in contact with Diego from Chile who was interested in my SE 6CB5A concept. He got a partial kit for this amp and completed it recently. Diego was so kind to write about his experience, so here is his guest post:


Hi, I am Diego from Santiago, Chile, and I recently finished my first DIY amplifier: Thomas' 6CB5A, the version with separate PSU and Tango interstage and output transformers. Thomas asked me to write some impressions of the whole building experience. 


Let me talk about myself a little bit. I started following Thomas' blog around a year ago and was fascinated by the amps he showed, and was also impressed by the choices he made in the PSU design and the circuits. The concept is to use a very well filtered (passive) PSU and reduce the number of components in the circuit to the minimum, using nice quality components. Add to that a flexible operation point for the tubes (not written in stone) and a nice headroom, and I was convinced that when choosing an amp to build for the first time it would be one of Thomas' designs. I have not built an amp before, but you have to start somewhere… I did small modifications to an Almarro EL84 single ended and built a passive volume control using a Tribute inductive autoformer. That was my experience. What I had was some understanding of electric circuits because I studied engineering, but something very basic.


Then on March this year I decided to build the 6CB5A amplifier. The requirement was simple: I needed an integrated amplifier with more than 5 W able to drive speakers (MLTL Fostex FE108sigma) and my headphones (Hifiman HE500). The 6CB5A was an obvious choice to me, specially because all the tubes are readily available at ebay at very low prices. I started emailing Thomas about the components and the circuit. I decided to build the top version of the amp because otherwise I would start wondering what if I had chosen better components. Thomas was very flexible in the components to get from him, I finished getting the chokes, resistances, condensers, tubes, sockets, power transformers and the cabling from him. I got the Tangos directly from their distributor in Japan. The stainless steel metal plates and the wooden boxes were made locally. After around 30 emails with Thomas, by the end of March the Tangos and Thomas' packages were shipped to Chile.


The metal plates and the amplifier layout were designed by me using pictures from Thomas and information he sent me about some of the plates he designed as a reference. Several custom enclosures were discussed, but none was strong enough for the amp. It is very heavy, probably over 25 kg. If you use stainless steel you could do with 3 mm thickness, with aluminum 4 mm is the minimum acceding to Thomas. At the end I made an autocad drawing and send the plates to be cut using water jets. The wooden boxes were made of coigue (a native wood from the Andes) by a local carpenter.


After going through customs in Santiago, I had all the electronic components by middle May. The wooden boxes were ready by the end of May, so I was able to start the construction of the amp at the beginning of June. The power transformer deserves a special mention. It has 2 grounds, one to connect the safety ground and another you could leave floating or connect to the mains to solve ground loops. The primary has inputs for 220, 230 and 240 V, which is very good to make small voltage adjustments for the heaters (it would be nice to have a tap for 210 V as well in this part of the world…). And then it has 2 secondaries that combined are able to supply any voltage between 100 and 625 V in 25 V steps, so you could use it for virtually any design.


Once you have all the components with you and having studied previously the connections it took me 4 days to have the amp sounding. You work fueled by the desire of listening for the first time. For volume control I recycled my Tribute autoformer volume control. Thomas was not very convinced of not driving the amp using a proper active line stage. But I plan to use the amp with a Metrum Octave dac which did a good job driving the autoformer with my Almarro, so I included in front of the circuit into the wooden box. It worked fine.


The amp is now finished, has been used every day for more than 10 days, so let me share some listening impressions. No hum at all with the speakers or the headphones. This is a quality I value a lot on audio equipment because it means better signal to noise ratio. The dynamics are impressive, when the music grows (in fortissimos or where you need high SPL) it is not just louder, but bigger. I don´t know how to say it better, specially in english… Low level listening is a pleasure, you don´t feel there is something missing if you don't crank the volume up, which I feel is a consequence of high signal to noise ratio and good dynamics. But none of these things is the most impressive of the amp. What impresses me the most the body and tone intensity of the music, these qualities are in a hole new level in my system. I have listened to some custom made 45 amps that share these qualities, but with 5 times less power (would love to listen Thomas' 45 but it will be hard unless I build it myself…). I don´t know if this makes sense, but the feeling is sound now goes out of the speakers instead of staying inside them, maybe this is these called soundstage. Bass and treble extension improved a lot, bass is articulated and controlled, now I know I was listening to distortion in some tracks on my previous amp. Treble has a very interesting quality. There is much more detail than before, better location and definition of the sound, but even if I try I had not been able to make the system sound bright. I think the word is refined. Dylan´s harmonica sounds perfect, violins and cellos have that wood smell and tone intensity… A small anecdote, my girlfriend has never noticed any of the changes I made to the system… until now, her comment was the previous amp sounded like a cheap radio… 


I did not know my speakers were capable of sounding like they are now. The Tango output transformers are very flexible, they have outputs for 8 and 16 ohm loading the primary 2,5, 3,5 and 5,0 kOhm. I found them sound best at 3,5 kOhm primary and 8 Ohm. 5 kOhm gives more damping factor, reduces gain a little and in my view you get a more solid state sound, but of course this is speaker dependent. 2,5 kOhm is a little bit too much tube sound to me. On the Hifiman I use the 16 Ohm taps for 2,5 and 3,5 kOhm primary, which load the tube at 5,4 and 7,5 kOhms respectively after accounting for the headphones impedance of 34 Ohm. I though I prefer the second one (7,5 kOhm) at first but now I am starting to think they sound better loading the tube at 5,4 kOhm, with a somewhat fuller sound.


I measured the gain (V out / V in) and it is around 5,5 which is a nice number if you have a source of 2 VRMS (like my dac) and speakers over 93 db. On some recordings where the level is really low you might want a little more gain, but remember my speakers are 89 db and I like to listen loud. But I have experience this only with some DSD recordings, not with regular CDs.


To take into account the size and weight of the amp, I thought I have to treat it not like a pice of audio equipment, but like a piece of furniture. So I got some wheels and sourced some tempered glass to put on top of each box to place the rest of system. This is how it is installed on my living room right now.


To finish I have to congratulate Thomas because he designed a wonderful amplifier, maybe the best I have heard, and best of all, it is mine and I built it! At the end, when you are located in Chile you don´t have the opportunity to listen a lot of nice hifi gear, and making the decision of building an amplifier that you only have read about it is a big leap of faith, putting all your confidence on the designer not only for the circuit but for troubleshooting. Specially when the components are not cheap like in this case. Now I can say this leap of faith was worth it.

Diego Rojas

PS: You can read about this amp in spanish at our local hifi forum     


Thanks a lot, Diego for sharing this story!  And congratulations for the finished project. It is great that the 6CB5A concept made it's debut in Chile!

Best regards


Thomas

Wednesday, June 19, 2013

Tube of the Month : The 6HV5A

Hi!

This months tube is one of the very last developments of the vacuum tube era. A tube which was made for the regulation of the high voltage in color TVs. The 6HV5A.


The 6HV5A is a beam triode. It is very similar to the 6HS5 which was already presented in the tube of the month series almost two years ago. Pinout and most of the technical parameters are the same between these two tubes. So I won't repeat all the technical details.

The 6HV5A has a slightly higher max. plate dissipation which brings the drawback of also higher heater current. It is physically a bit larger to allow the 5W extra dissipation. A comparison between Sylvania 6HS5 and 6HV5A:


Since also the usage of this type of tubes was extensively covered in the 6HS5 article, I will not repeat that but rather allow a closer look to the construction of the tube.


The base:


During the manufacturing process the tube got evacuated through the little glass stem at the bottom:


Removing the glass to get a better view of the construction details:


The three rings held the getter material which was flashed after evacuation of the glass bulb. The electrodes held in place by the two mica discs at either side. The beam forming plate is visible through the rectangular holes:


The heater wire entering the cathode sleeve:


The heater wire ends are welded to the pins:


The heater wire partly removed from the cathode:


A close up of the heater :


Heater completely removed:


The plate, removed from the rest:


The beam plate, grid and cathode assembly:


This photo gives already a hint of the remarkable grid structure. A close up:


Zooming further in:


Removing the beam forming plate:


Beam plate, grid and cathode separated:


The beam forming plate:


A close up of grid and cathode ends:


This photo shows the scale of the structures:


The grid pitch:


Let's have another look at the magnificent grid:


Here we see how the grid wire is soldered (or welded?) to the grid rod:


View from the top side:


More details:


This tube is a fine example to show how far the vacuum tube technology was evolved before it got abandoned.

Best regards

Thomas