
As mentioned in my last post of 2013, I have a 300B amplifier in the making. I decided to build this amp in anticipation of the german made ELROG 300B which is in development. This amp will serve as a test vehicle to evaluate the tubes. The amp was actually scheduled to be built in December but got delayed a bit since I had to wait for some chassis material. In the meantime the materials arrived and while I wait for some stuff which is needed to continue with the 211/211 amps, I finished the single ended 300B mono blocks. Of course this amp deserves a 'Making Of' series of posts. I will start with the power supply.

The power supply concept follows my usual philosophy: Full wave bridge rectified B+ with 4 6AX4 TV dampers. Choke filtered (choke input) with an LCLC section in the PSU chassis, followed by individual LC decoupling segments in the amplifier chassis.
I prefer to heat the 300B filaments with the cleanest possible DC. While AC heating is ok for 45 or 2A3 amps, with the 300B I want DC for absence of any modulation of the signal by the filament supply. While current regulated filaments are quite popular and work well, I still prefer a purely passive approach with an LCL supply. LC in the PSU section followed by a local L in the amplifier.
Since the driver will also be a directly heated triode, two independent filament supplies are needed, which makes a total of 4 chokes in the PSU chassis. The amplifiers will be mono blocks, each with it's own external supply.
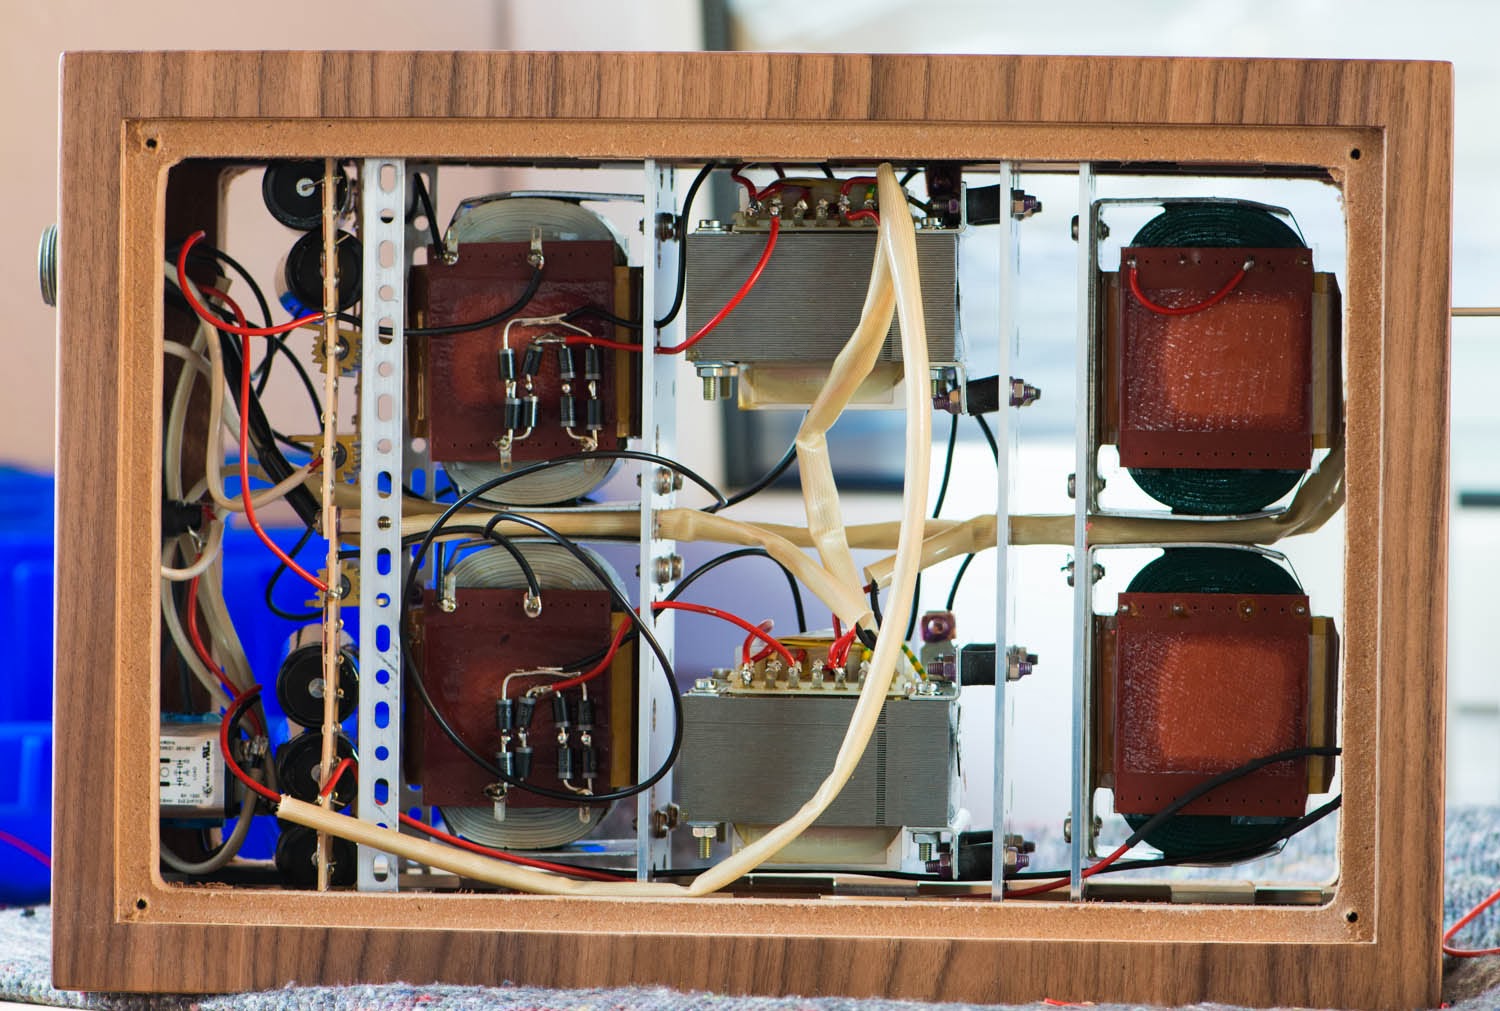
The chokes and filament transformer are mounted on sub assemblies which go inside the chassis:

The sub assemblies prewired and inserted into the wooden frame:

The high voltage power transformer and rectifier tubes will reside on top of the chassis along with the B+ smoothing caps:

Pre wiring of the top metal plate as far as possible before it is placed on top of the chassis:

Doing the last connections before the lid is closed:

The finished power supply:

This time with a new color scheme. I found the metallic bordeaux red of the transformer cover to make a beautiful contrast with the metallic graphite grey of the capacitors:

The rectifier bridge:

Stay tuned for the assembly of the amplifier section and listening reports of this amp.
Best regards
Thomas

Hallo thomas
ReplyDeleteGibts schon irgendwo infos zu den elrog 300b bezüglich preis?
Und wichtig gibts schon bilder?
Grüsse hannes
Hallo!
DeleteWenns was zu berichten gibt wird es sofort auf meinem blog erscheinen. Der Preis wird mindestens im 4-stelligen Bereich für das Paar liegen.
Gruß
Thomas
What is the advantage of this rectifiers/PSU over the older ones with 866A or similar (mercury vapor or xenon) tubes, apart from price?
ReplyDeleteI've never heard another rectifier sounding as good as mercury....
Hi!
DeleteSlow turn on, size of tubes, less heater current, etc...
In a well designed PSU, rectifiers have much much less impact on the sound
Thomas
Will there be a schematic at one point, and will we see a scaled down version (mono block or one chassis amp)?
ReplyDeleteBest
Kris
Hi Kris,
Deletea schematic will be provided along with a purchase of a kit or at least a partial kit. No scaled down version is planned, unless somebody orders such a version.
Best regards
Thomas
How do I purchase a kit?
DeleteI don't offer kits any more, only finished amps
DeleteHi Thomas. Beautiful and inspirational as always.
ReplyDeleteThose transformer covers look stunning.