Hi!
Today we are celebrating the 4th year of making ELROG tubes at Deutsche Elektronenröhren Manufaktur GmbH.
As we did with the ER242 and ER284 which are molybdenum versions of ER211 and ER845, the ER300B-Mo has the same technical parameters of the ER300B, but has even further increased sound qualities due to the use of molybdenum for the plate.
As in the ER242 and ER284 the use of molybdenum has a similar impact on the sound of the tube. Here a quote from a lead customer who evaluated early prototypes:
To me the sound of the ER 300B M are again more gripping. More linear. More solid, locked imaging. Better dynamics. More separation.
It feels like the ’transport’ of the sound is more rock solid. It really feels like the same kinda musical step up i experienced going from the my previous set of tubes to the normal ER300B’s.
But now it’s an even more ’solid’ version. The sound signature is the same as the standard ER300B, but everything is much better.
I was listening at the new Tool album, from which is not easy to uncover all the details. It can actually sound very flat on a normal system. With the ER300B M, I finally hear way more separation of frequencies, and as a result it sounds way more ‘grunting’ and ‘gripping’.
We expect to ship regular production of the tube by mid to end September. The ER300B will get a new box with a different color scheme. The boxes still need to be printed.
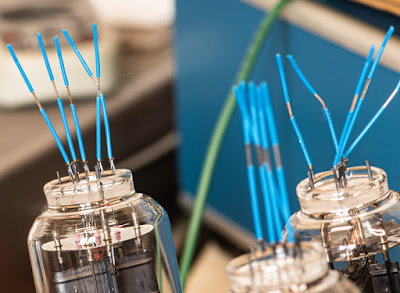
Besides the ER300B-Mo yet another version of the 300B is in development. A hint about that is shown in the picture above. Stay tuned for further news about this tube as the development continues.
Now I will give some insights to the production of a 300B tube at Deutsche Elektronenröhren Manufaktur GmbH.
Above we see plates which consist of two in-house stamped metal parts. Next we have the grids:
Here we see a grid being wound:
Grid and filament mounted together:
Some close ups showing the delicacy of this sub assembly.
Finished sub assemblies waiting for the next production step:
The bottom part or foot of the glass bulb with the through glass connection rods.
The foot being prepared for assembly.
Welding support rods to the foot:
Mounting the grid-filament assembly to the foot:
Next springs are added which give the internals good support inside the glass bulb.
Each tube gets a unique serial number:
Now the plates can be added.
The finished assembly:
The ring which contains the getter material is added:
Here we see the raw glass tubes which are used to mould the tube bulbs.
These are then formed into the bulbs by a laboratory glass producer, Schmidt Laborglasgeräte.
The larger for ER211, ER845, ER242, ER284, ER887 and ER888. The thin tube is used for the evacuation of the bulbs.
The glass tube ready to receive the electrode assembly.
The evacuation stem is sealed and broken off. The top is then melted over a flame to form a smooth tip.
Before the base is added the filament gets formed and first measurements are done.
Before the electrode system is inserted a special black coating is applied to the inside.
Then the tube goes onto the vacuum station. Evacuation is done in several steps, during some of which the internals are heated with an RF induction heater to drive out gasses.
The filament gets powered up with a higher than nominal voltage for an initial forming and burning off of residues on the filament surface. All this is done while evacuation continues.
Now the getter ring is heated by RF induction.
Then connection wires are added which will later make contact to the base pins.
Then the tube is mounted on the base.
Now the tube is ready to go into burn in and then final test.
I hope you enjoyed this tour through the manufacturing of a vacuum tube. I would like to thank you all for the support and encouragement to continue this adventure. And of course many thanks to the hard working staff at Deutsche Elektronenröhren Manufaktur GmbH.
Best regards
Thomas


Hallo Thomas
ReplyDeleteEine indirekt geheizte 300B als Upgrade für deinen 6CB5A Verstärker wäre eine Wucht.
Grüsse Hannes Schrotter
I have loved following your blog for quite some time - this post is so illuminating :) Thanks for showing the process in such detail!
ReplyDeleteThomas, Congratulations on your anniversary. Quite detailed and complicated process involved in the production of a vacuum tube. The excellent craftsmanship is apparent from the posting. All the best to you and your work crew. May you and crew continue to put out a no holds barred product!! Randy
ReplyDeleteAnd to think how many millions of tubes were made by women on assembly lines.
ReplyDeleteReally enjoyed the post. I always thought the getter had to be flashed while the tube was being evacuated... interesting to know it may be done also afterwards.
ReplyDeleteIt must be done after evacuation, otherwise the getter vapour would immediately get sucked out of the tube if evacuation is still in progress and no mirror could form on the glass
Delete