This is Thomas Mayer's blog about vacuum tube audio, to share updates about new amplifiers and preamplifiers and ELROG vacuum tubes.
DISCLAIMER
All rights of photos and text reserved. Usage of photos or text from my blog on other websites or for any other purpose only with prior permission. If you want to use any material from my blog please contact me by email.
This month I would like to present a classic full wave rectifier tube. Meet the 5R4.
The 5R4 is a directly heated full wave rectifier which means it contains two diodes with a common filament.
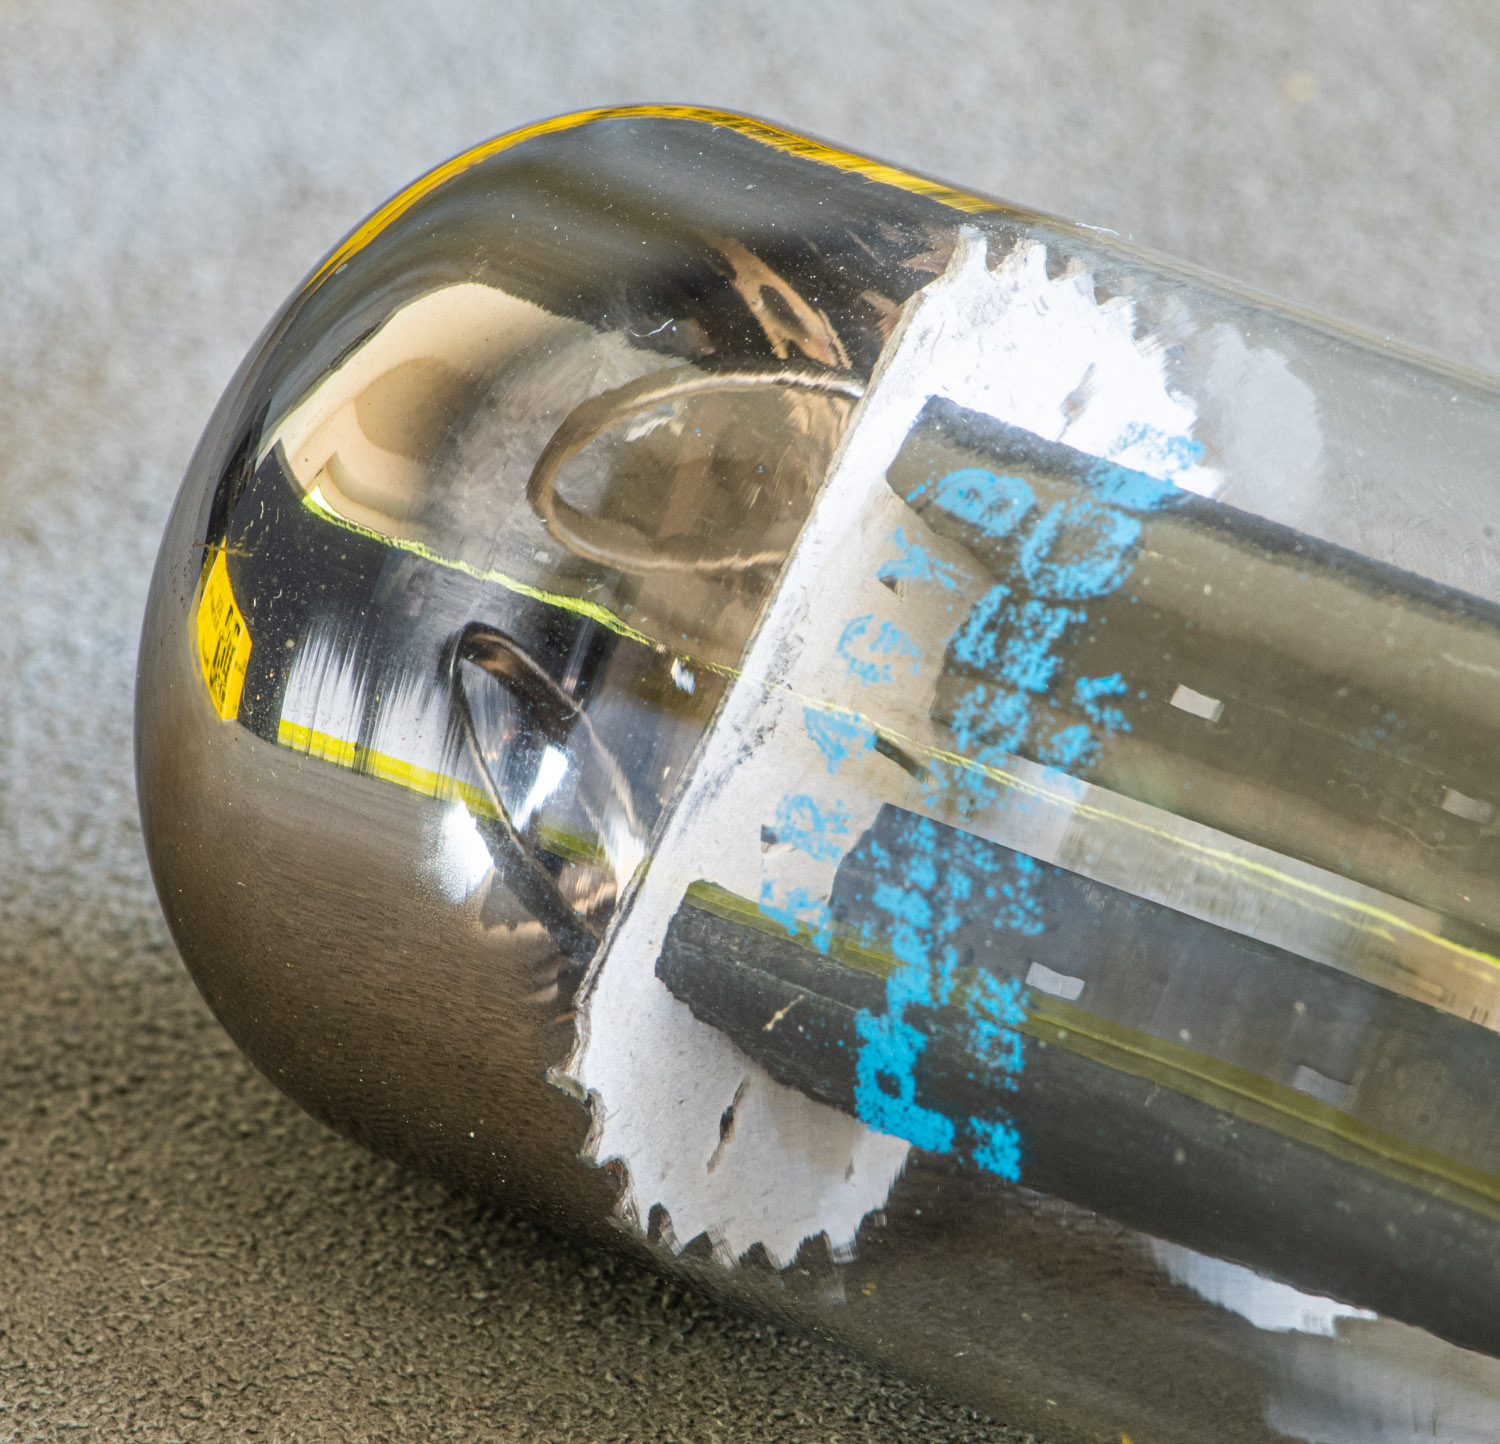
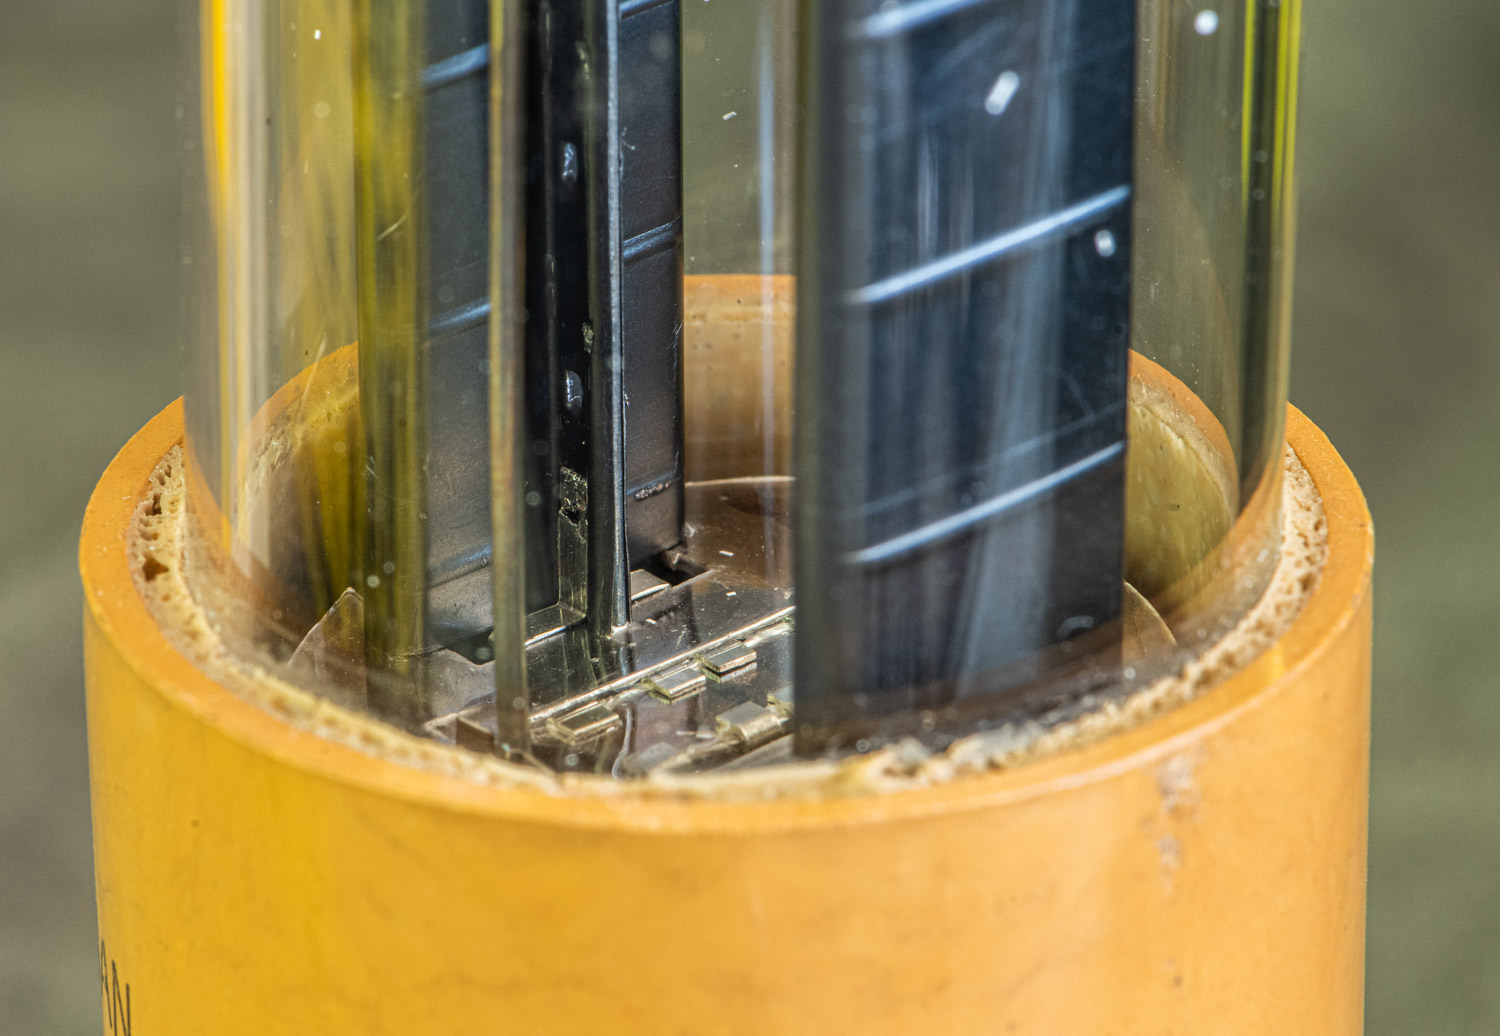
The 5R4 shares the same Octal pinout which is used by most of the classic 5V rectifier tubes. The pin connections can be seen on the left. The plates are connected through pins 4 and 6 with unused pins between them and to the filament connections for better voltage insulation. The filament is operated at 5V and needs 2A. The rectified voltage can be obtained from either end of the filament or from a center tap of the heater winding on the power transformer. The 5R4 has the highest peak inverse voltage rating among the 5V rectifiers. It can handle up to 2800V of inverse voltage, which was later uprated to 3000V in the 5R4B. The data sheet recommends a maximum input capacitor of 4uF, which was uprated to 20uf for the B version. DC output voltages of 800 V can be obtained from a single 5R4 and even in excess of 1000V with the 5R4B. It can provide up to 250mA of DC current. But this comes at the cost of higher internal voltage drop compared to other rectifier tubes. While the 5R4 was initially made in ST (shoulder type) glass, the 5R4B were made with straight sided glass bulbs. I only have 'B' versions in my collection. Let's start with 5R4GYB made by RCA:
The G in the type designation stands for glass bulb, while the Y indicates micanol base.
For good high voltage insulation the unused pins were omitted from the base.
Today we are celebrating the 4th year of making ELROG tubes at Deutsche Elektronenröhren Manufaktur GmbH.
Time to give some insight about what is going on in the tube production. As every year, we have been working on new tube types. The photo above shows our tube range which is expanded to 12 types now. Last year we added the ER887 and ER888 to our portfolio. This year we are introducing a molybdenum plate version of the ER300B, called the ER300B-Mo.
As we did with the ER242 and ER284 which are molybdenum versions of ER211 and ER845, the ER300B-Mo has the same technical parameters of the ER300B, but has even further increased sound qualities due to the use of molybdenum for the plate.
As in the ER242 and ER284 the use of molybdenum has a similar impact on the sound of the tube. Here a quote from a lead customer who evaluated early prototypes:
To me the sound of the ER 300B M are again more gripping. More linear. More solid, locked imaging. Better dynamics. More separation.
It feels like the ’transport’ of the sound is more rock solid. It really feels like the same kinda musical step up i experienced going from the my previous set of tubes to the normal ER300B’s.
But now it’s an even more ’solid’ version. The sound signature is the same as the standard ER300B, but everything is much better.
I was listening at the new Tool album, from which is not easy to uncover all the details. It can actually sound very flat on a normal system. With the ER300B M, I finally hear way more separation of frequencies, and as a result it sounds way more ‘grunting’ and ‘gripping’.
We expect to ship regular production of the tube by mid to end September. The ER300B will get a new box with a different color scheme. The boxes still need to be printed.
Besides the ER300B-Mo yet another version of the 300B is in development. A hint about that is shown in the picture above. Stay tuned for further news about this tube as the development continues.
Now I will give some insights to the production of a 300B tube at Deutsche Elektronenröhren Manufaktur GmbH.
Above we see plates which consist of two in-house stamped metal parts. Next we have the grids:
Here we see a grid being wound:
Grid and filament mounted together:
Some close ups showing the delicacy of this sub assembly.
Finished sub assemblies waiting for the next production step:
The bottom part or foot of the glass bulb with the through glass connection rods.
The foot being prepared for assembly.
Welding support rods to the foot:
Mounting the grid-filament assembly to the foot:
Next springs are added which give the internals good support inside the glass bulb.
Each tube gets a unique serial number:
Now the plates can be added.
The finished assembly:
The ring which contains the getter material is added:
Before the assemblies are inserted into the glass bulb they get thoroughly washed in an ultrasonic bath.
Here we see the raw glass tubes which are used to mould the tube bulbs.
These are then formed into the bulbs by a laboratory glass producer, Schmidt Laborglasgeräte.
Here we see the two sized we use. The smaller for ER300B, ER801A, ER50 and the rectifiers.
The larger for ER211, ER845, ER242, ER284, ER887 and ER888. The thin tube is used for the evacuation of the bulbs.
Before the electrode system is inserted a special black coating is applied to the inside.
The glass tube ready to receive the electrode assembly.
Glass tube and foot are moulded together to form an airtight seal.
Then the tube goes onto the vacuum station. Evacuation is done in several steps, during some of which the internals are heated with an RF induction heater to drive out gasses.
The filament gets powered up with a higher than nominal voltage for an initial forming and burning off of residues on the filament surface. All this is done while evacuation continues.
The evacuation stem is sealed and broken off. The top is then melted over a flame to form a smooth tip.
Now the getter ring is heated by RF induction.
In the next clip we can see how the getter is activated and condenses on the glass.
Then connection wires are added which will later make contact to the base pins.
Before the base is added the filament gets formed and first measurements are done.
Then the tube is mounted on the base.
Now the tube is ready to go into burn in and then final test.
I hope you enjoyed this tour through the manufacturing of a vacuum tube. I would like to thank you all for the support and encouragement to continue this adventure. And of course many thanks to the hard working staff at Deutsche Elektronenröhren Manufaktur GmbH.